Prepare for mapping your site
Before you run a habitat mapping activity with your class, use the steps below to prepare for the sessions and get familiar with the Habitat Mapper tool, to make the activities run as smoothly as possible.
By mapping your site, you will be collaborating with research scientists at the Natural History Museum on real science research into how we can support nature in our villages, towns and cities.
Three preparation steps
1. Make sure your site is on the Nature Park map (less than 10 minutes)
Before you get started, an educator needs to add your school, nursery or college site to the Nature Park map using the site boundary creator tool.
2. Practise using the Habitat Mapper tool
Open the Habitat Mapper on a tablet, chromebook, laptop or desktop. You can use it outdoors if you have internet connectivity and devices you can take outdoors, or use in in the classroom. From the Nature Park website, click through to the Habitat Mapper tool using the button below. If asked to log in again, don't type in any log in credentials, just click the big blue box.
Open Habitat Mapper tool
Spend a few minutes practicing drawing an area of habitat (e.g. an area of grass), drawing habitat lines (e.g. for long thin features like fences), and adding microhabitat points (e.g. a log pile) to the map. Just don't click 'save' so these habitats are not added to the real map while you practice (or click to edit then delete them). Familiarise yourself with the different options so you know which habitats should be mapped as areas, lines, or points.
When you run the activities with your class, your learners will decide which habitat types are on your site by working through the outdoor activities and flowchart provided.
Decide whether you will draw habitats directly onto the Nature Park map while you are outdoors, if you have mobile devices and internet connectivity, or if you will do this back in the classroom. If you plan to do this indoors, you will need a printed map of your site to draw habitats on to while you are outdoors, before transferring them to the online map back in the classroom.
3. Plan how you will involve learners in mapping habitats on your site (up to one hour)
Use these two planning resources to prepare:
Planning tool What habitats do we have? Worksheet
Education sites vary, so tailor the habitat mapping process to your setting. Sites with lots of natural areas may have all eight habitat categories, others may only have one or two. You can spread these habitat mapping activities over a half-term or whole term.
Mapping your site is a collaborative process between educators and learners. Our planning tool will help you to consider:
- which habitats you have on site, therefore which resources to print
- how long this unit of learning may take
- which learners to engage in which task
If you are involving multiple classes or year groups, liaise with colleagues to agree how to divide up and schedule the activities.
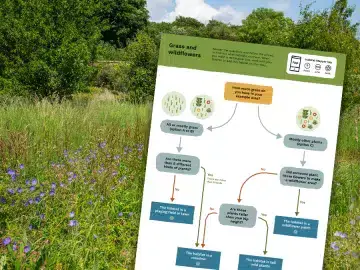
Each habitat category has a dedicated resource page, with instructions for educators, activity sheets to download and print, a printable flowchart to identify the habitats and a link to the Habitat Mapper tool.
- Ground without plants
- Grass and wildflowers
- Water
- Flowers and food
- Hedges and bushes
- Vertical features
- Trees
- Microhabitats: Homes and help for nature
It's best to map playgrounds, pathways, carparks etc first (Ground without plants), and areas of grass and playing field (Grass and wildflowers) as these are likely to cover the largest areas of your site.
Then move on to mapping trees, hedges and bushes, flowers and food, and water habitats.
Finally, add in fences and walls (vertical features), and small features like bird boxes, bee hotels and log piles (microhabitats).
Working in this order will help you to build up your map over time.
What to do next

Mapping your site
Begin activity
Habitats: Mapping ground without plants
Begin activity